
Zabbix is an open source network monitoring tool that works with a centralized Linux-based Zabbix server.
The Zabbix server automatically collects and parses data from monitored hardware so administrators can check availability and see trends in network performance. The server communicates to the native software agents that are available for many operating systems, including Linux, UNIX and Windows. For operating systems without an agent, generic monitoring protocols such as Simple Network Management Protocol (SNMP) or Intelligent Platform Management Interface (IPMI) can be used.
This article is for information only.
Install Centos 7 operating system
Download image of operating system Centos 7 from site https://www.centos.org/download/
Prepare host or virtual server according to https://wiki.centos.org/About/Produc/
Begin installation.
‘INSTALLATION SUMMARY’ window
Set up data and time in menu ‘DATE & TIME’, add keyboard in menu ‘KEYBOARD’, choose physical disk in menu ‘INSTALLATION DESTINATION’, choose installation type in menu ‘SOFTWARE SELECTION’. A lot of sites recommend minimal installation. But if you don’t have Linux operating system skills, you may have a problems. I prefer ‘GNOM Desktop’ installation, because ‘GNOME Desktop’ has a lot of required utilities and GUI. In ‘NETWORK & HOST NAME’ menu you have to setup network card parameters. Continue installation.
During the installation, we set the root password and create a working user. When creating a user in ‘ADVANCED’, additionally include it in the group ‘WHELL’. Wait till installation will be finished.
Login, accept all questions. Start the terminal. Update the operating system using the command:
$ sudo yum -y update
Switch to SU mode, but this is not a good practice. Install MC or another file manager for convenience edit of configuration files. Using the command:
# yum install mc
Disable SElinux by editing file:
# mcedit /etc/sysconfig/selinux
Change the key:
SELINUX=disabled
Be careful. This key is in the middle of the file, not at the end. Reboot the server. If after reboot the operating system does not boot and gives you the error message ‘FAIL TO LOAD SELINUX POLICY. FREEZING’, you miss something, the next paragraph for you. Otherwise may skip.
Next paragraph is for inattentive.
It is necessary to change operating system boot configuration, by adding the key ‘SELinux = 0’ in boot parameters.
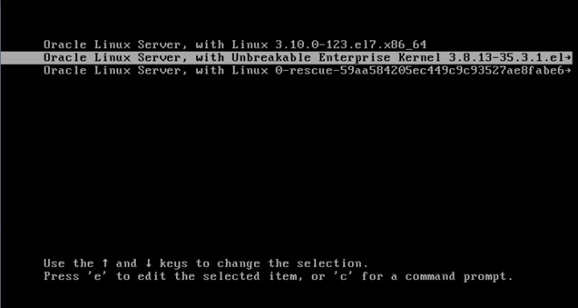
Press ‘e’ to edit the selected item.
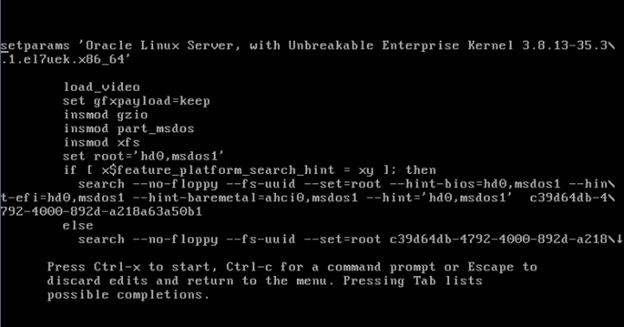
Scroll down to ‘linux16’ or something similar and add ‘SELinux = 0’ key.
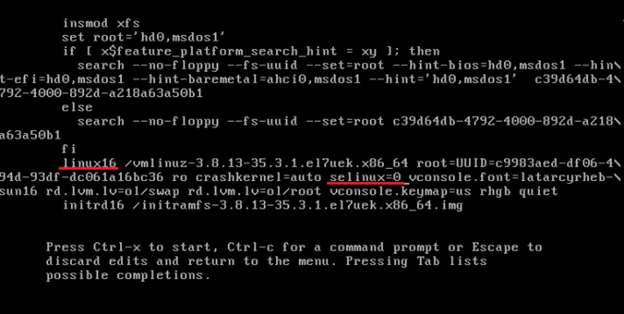
Press ‘CTRL-X’ to start.
Next steps are for all.
Install mariadb and create database
Install mariadb using the command:
# yum install -y mariadb mariadb-server
Start mariadb and add to autostart:
# systemctl start mariadb
# systemctl enable mariadb.service
Make initial setup mariadb using the script:
# /usr/bin/mysql_secure_installation
Set a password for root user. Pleas note, this is not root user for operating system. The remaining settings are left with the default values.
Create a database:
# mysql -uroot –ppassword (where the ‘password’ is the password was created on the previous step)
>create database zabbix character set utf8 collate utf8_bin;
>grant all privileges on zabbix.* to zabbix@localhost identified by ‘zabbixpassword’;
You can specify another User ‘zabbix@localhost’ and password ‘zabbixpassword’.
Install Zabbix
Add the repository:
# rpm -ivh https://repo.zabbix.com/zabbix/3.2/rhel/7/x86_64/zabbix-release-3.2-1.el7.noarch.rpm
Install Zabbix:
# yum install -y zabbix-server-mysql zabbix-web-mysql
# zcat /usr/share/doc/zabbix-server-mysql-3.2.4/create.sql.gz | mysql -uroot -ppassword zabbix
Be careful, the path name changes with the new zabbix version. Change zabbix server configuration file:
# mcedit /etc/zabbix/zabbix_server.conf
DBHost=localhost
DBName=zabbix
DBUser=zabbix
DBPassword= zabbixpassword
Start zabbix and add it to autostart:
# systemctl start zabbix-server
# systemctl enable zabbix-server
Check the log file for errors during installation:
# cat /var/log/zabbix/zabbix_server.log
Set up you time zone:
# mcedit /etc/httpd/conf.d/zabbix.conf php_value date.timezone Europe/Moscow
Start httpd and add to autostart:
# systemctl start httpd
# systemctl enable httpd
By clicking on the link, check the availability:
Instead of localhost you can input ip-address or dns-address of your server and connect remotely. You may need to configure the local firewall or disable it using commands:
# systemctl stop firewalld
# systemctl disable firewalld
Open Zabbix in your web browser.

Press ‘next’, make sure that the OK status is presented in all points in the summary check table. On the next page specify the connection parameters to the database, repeating the settings created earlier. Next leave the default settings. Default user name and password ‘Admin’ ‘zabbix’.
Basic installation of Zabbix is complete.