
We begin the configuration of the Zabbix server.
Default login and password ‘Admin’ and ‘zabbix’. Set up Email notifications, in the menu ‘Administration -> Media types -> Email’.
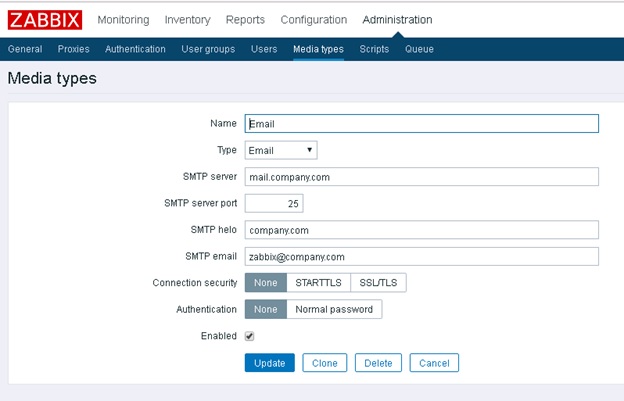
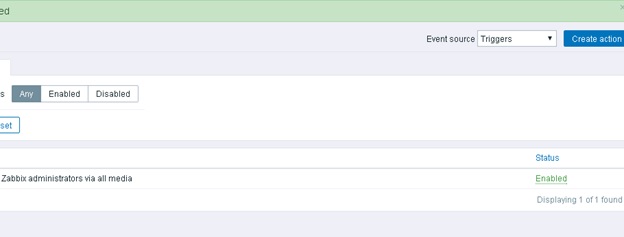
Specify the connection settings for the corporate e-mail server and the e-mail address of the sender, in the menu ‘Administration -> Users -> Admin -> Media’. Add recipient addresses, check the types of notifications and click ‘Update’. Go to the menu ‘Configuration -> Action’ click ‘Disabled’, the sending of notifications is activated.
The message format can be edited in the menu ‘Configuration -> Action -> Operations’.
Enable Zabbix server monitoring.
Add the zabbix agent using the command:
# yum -y install zabbix-agent
Start zabbix-agent and add to autostart:
# systemctl start zabbix-agent
# systemctl enable zabbix-agent
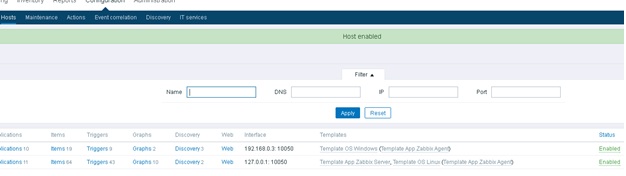
Go to the menu ‘Configuration -> Hosts’ and click ‘Enabled’ next to ‘Zabbix server’
Restart the agent using the command:
# systemctl restart zabbix-agent
Installing the Zabbix server agent on Microsoft Windows Server.
Download the agent files from the site http://www.zabbix.com/download. Create a folder on the server (I created in the root of the disk C: ) with a name convenient for you (for example “Zabbix”), copy files to this folder from the folder ‘…zabbix_agents_3.2.0.win\bin\win64’ (or win32, depending on your operating system) and the file ‘zabbix_agentd.win.conf’ from the folder ‘…\zabbix_agents_3.2.0.win\conf’. In a text editor open the file ‘zabbix_agentd.win.conf’ and edit the values ‘Server=192.168.0… ServerActive=192.168.0… Hostname=server-…’. The first two values are the ip address of the Zabbix server, the name of the host on which we install the client (it can be any name convenient for you and different from the host domain name).
The next step, on the command line running as administrator, is to install the Zabbix server agent:
c:/zabbix/zabbix_agentd.exe –config c:/zabbix/zabbix_agentd.win.conf -–install
Start the service ‘Zabbix agent’
![]()
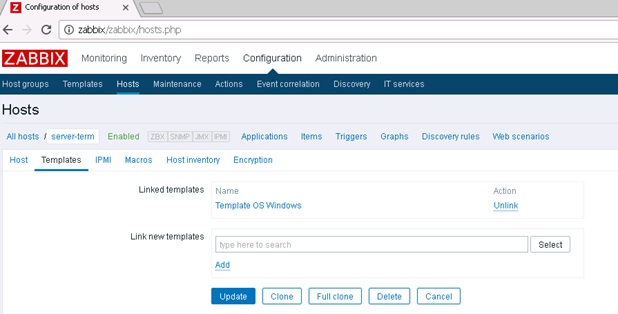
Now you need to enable monitoring, go to the menu ‘Configuration -> Host -> Create host’. In the field ‘Host name’ specify the name that we previously specified in the file ‘zabbix_agentd.win.conf’. In the field ‘Agent interfaces’ specify the IP address or DNS name of the host that we connect to the Zabbix monitoring system. In the field ‘Groups’ select the group you are pre-configured or create a new one in the box below. Go to the menu ‘Templates -> Select’, select the ‘Template OS Windows’, click ‘Select -> Add -> Update’.
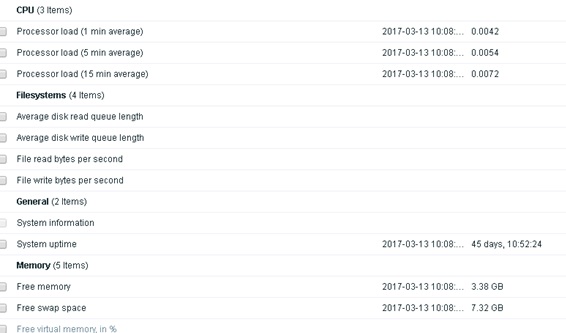
To check the receipt of the monotoring data, go to the menu ‘Monitoring -> Latest data’. In the field ‘Hosts’ click ‘Select’, select the server and click ‘Select’ again and click “Apply”
Similarly, you can monitor other Windows or Linux servers (do not forget, in addition to our example, fix in the file ‘/etc/zabbix/zabbix_agentd.conf’ options Server, ServerActive and Hostname).
Adding ESXi Host Monitoring.
Changing Zabbix server settings:
# mcedit /etc/zabbix/zabbix_server.conf
StartVMwareCollectors=2
VMwareFrequency=60
VMwarePerfFrequency=60
VMwareCacheSize=8M
VMwareTimeout=10
Restart the Zabbix server:
# service zabbix-server restart
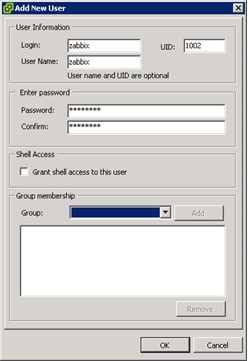
Connect to the ESXi server and create a user for connect Zabbix server to the ESXi
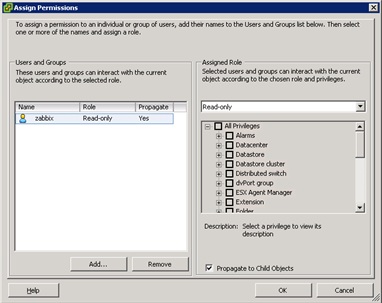
Assigned role ‘Read-only’
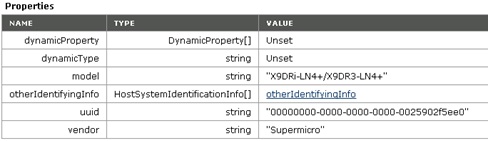
We go to the link ‘https://esxi/mob/?moid=ha-host&doPath=hardware.systemInfo’ (instead of ‘esxi’ in the link, substitute the name or ip address of your host) and look “uuid”.
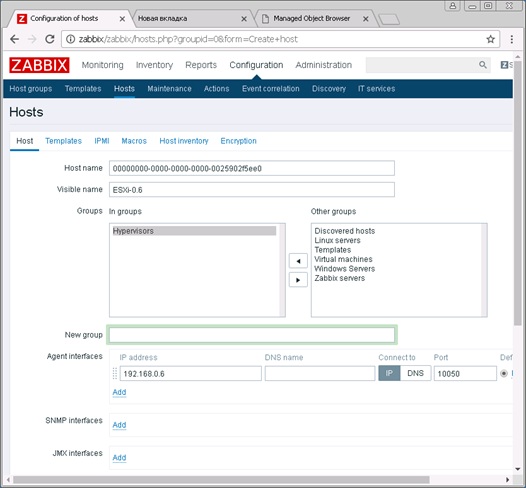
We return to setting up the Zabbix server to create the esxi host in the menu ‘Configuration -> Hosts -> Create Host’.
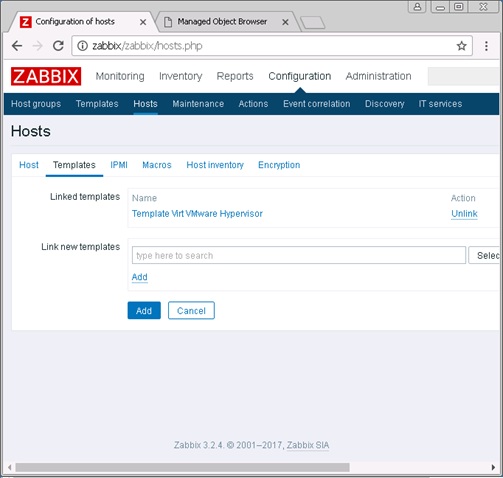
Adding a template
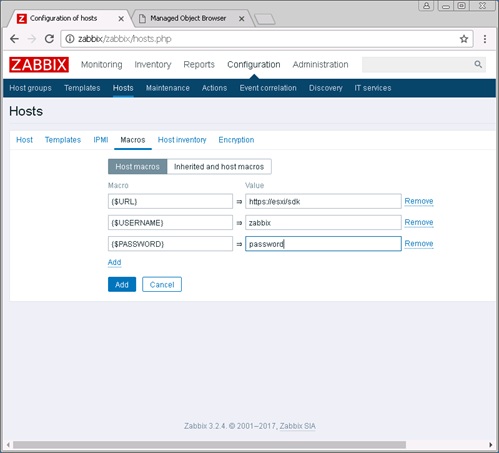
and the macro.
Click ‘Add’. Go to the menu ‘Monitoring -> Latest data’ and check that the data arrives.
That’s all, good luck.